User-Defined Borders in Cells
You can apply a variety of different lines to selected cells.
-
Select the cell or a block of cells.
-
Choose Format - Cells.
-
In the dialogue box, click the Borders tab.
-
Choose the border options you want to apply and click OK.
The options in the Line arrangement area can be used to apply multiple border styles.
Selection of cells
Depending on the selection of cells, the area looks different.
| Selection | Line arrangement area |
|---|---|
| One cell | |
 |
|
| Cells in a column | |
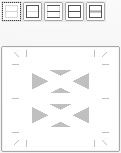 |
|
| Cells in a row | |
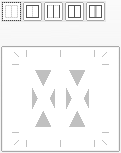 |
|
| Cells in a block of 2x2 or more | |
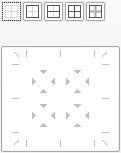 |
Default Settings
Click one of the Default icons to set or reset multiple borders.
- The thin grey lines inside an icon show the borders that will be reset or cleared.
- The dark lines inside an icon show the lines that will be set using the selected line style and colour.
- The thick grey lines inside an icon show the lines that will not be changed.
Examples
Select a block of about 8x8 cells, then choose Format - Cells - Borders.

- Click the left icon to clear all lines. This removes all outer borders, all inner lines, and all diagonal lines.
- Click the second icon from the left to set an outer border and to remove all other lines.
- Click the rightmost icon to set an outer border. The inner lines are not changed, except the diagonal lines, which will be removed.
Now you can continue to see which lines the other icons will set or remove.
User-Defined Settings
In the User-defined area, you can click to set or remove individual lines. The preview shows lines in three different states.
Repeatedly click an edge or a corner to switch through the three different states.
| Line types | Image | Meaning |
|---|---|---|
| A black line | ||
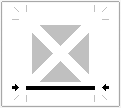 |
A black line sets the corresponding line of the selected cells. The line is shown as a dotted line when you choose the 0.05 pt line style. Double lines are shown when you select a double line style. | |
| A grey line | ||
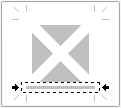 |
A grey line is shown when the corresponding line of the selected cells will not be changed. No line will be set or removed at this position. | |
| A white line | ||
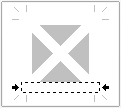 |
A white line is shown when the corresponding line of the selected cells will be removed. |
Examples
Select a single cell, then choose Format - Cells - Borders.
Click the lower edge to set a very thin line as a lower border. All other lines will be removed from the cell.
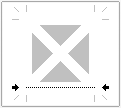
Choose a thicker line style and click the lower edge. This sets a thicker line as a lower border.

Click the second Default icon from the left to set all four borders. Then repeatedly click the lower edge until a white line is shown. This removes the lower border.
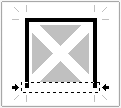
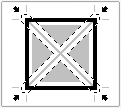
You can combine several line types and styles. The last image shows how to set thick outer borders (the thick black lines), while any diagonal lines inside the cell will not be touched (grey lines).
Adjacent Cells
This option becomes available when formatting a range of cells that already have borders and the new format defined for the range involves removing outer borders.
By default the option Remove border is disabled and the borders at the edges of the selected range are left unchanged. Check this option if the borders at the edge of the selection should be removed.
If the preset No Borders is chosen then the Remove border option is enabled.